In spite of Microsoft's attempts to thwart more privacy-oriented Windows 10 configurations, with minimal effort it is still possible to configure a relatively private install of Windows 10.
I should clarify, at this point you should have backed up any files you care about up to an external drive which won't be connected during this process. I am not liable for any damage caused to your system, files, or associated equipment due to this process.
After this, you will need to assess the licensing status of your system. If your system has a COA (certificate of authenticity) for Windows 7 Starter, Home Basic, or Home Premium; usually identified by a sticker on the rear or bottom of the machine, sometimes beneath the battery, which contains your product key or Windows 8/8.1 core/no name, or "with Bing"; usually identified simply by a sticker saying wither "Windows", "Windows 8", or "Windows 8.1", you will want to install Windows 10 Home if you wish to use your genuine license key (on systems that shipped with 8.x originally, the key will typically be auto-detected by the installer, blocking your option to install alternate editions [on the upshot, this will usually auto-activate your 10 installation]; Windows 7 systems may require you to insert your product key [found on the COA] either during installation, or afterwards if you choose to forego inserting it during installation). If your system has a COA for Windows 7 Professional or Ultimate, or Windows 8.x Professional, you should want to install Windows 10 Pro, as it offers more features than Home offers.
In the case of dealing with activating Windows 10 without a COA or legitimate key, KMS scripts exist, you can typically find them hosted on Github, I won't link any specific ones to avoid any copyright conflict (although, Microsoft doesn't seem to care that much, I'm willing to bet that their actual revenue source is OEMs, system builders, and enterprise sales).
I will be using a virtual machine for this installation, just to make things easier for me.
At this point, you will want to boot your system into the device selection menu (if your system does not have one or its key can't be found, see "For configuring the firmware on more modern systems", you can skip this if you already configured the system to boot from the flash drive before the internal drive.
If you created the install media with a tool like UUI, you might recieve a prompt telling you to Press any key to boot from CD or DVD for some reason, this isn't cause for alarm. I've seen it happen a handful of times, setup will just work as normal.
Once you boot into the installation, confirm your locales (in my case, everything is set as "English (United States)", yours will be different if you use a localized version of Windows) by clicking 'next', then click 'install now' (or your language's equivelant-- I am using the EN-US variant for this). After that, you will reach the product key entry screen:
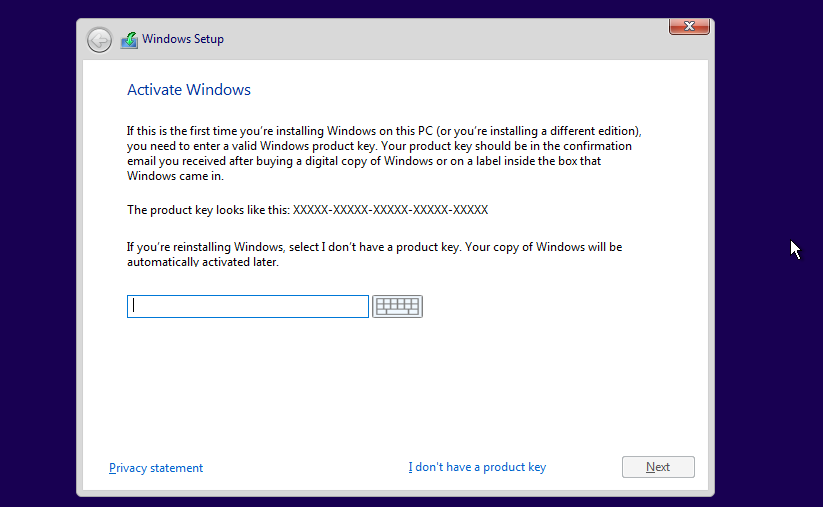 At this point, you will want to either enter your product key, or click 'I don't have a product key.' In my case, I will not use a product key, so I will be brought to this screen:
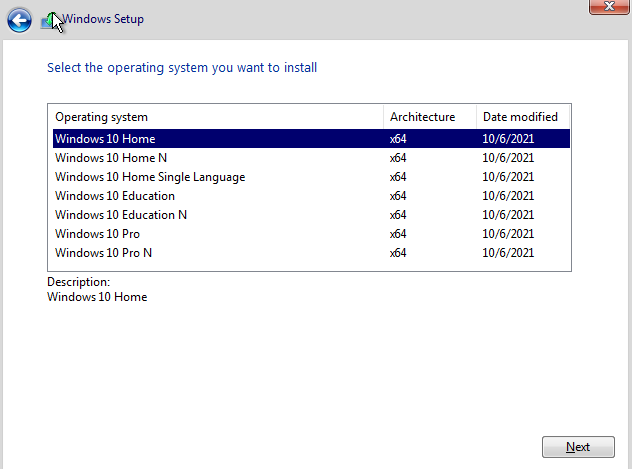
I will choose to install Windows 10 Home, only because this is both what my host system runs, and what most people doing this will likely end up with (to start with). I will leave partitioning up to you, as you can install over an old Windows installation (which saves your files/settings in 'Windows.old'), erase the drive, create a data partition, or even preserve a dualboot with another OS. Even if you are installing over an old Windows installation, I still strongly advise creating a backup of your files just to be safe, I would also advise doing the same with any dualbooted operating system, since reinstalling Windows can interfere with GRUB, your other OS's filesystem, and/or the general integrity of the partition table at the very worst. Now, from here, just sit back for a while and let the installer do its thing, when you come back, you should be in the OOBE (out-of-box-experience) menus, if not, unplug your flashdrive and reboot (if you still do not see the OOBE menus, re-do the installation process).
After you get into the OOBE menus, you might want to mute Cortana (click the microphone icon in the lower left corner to do this), then click 'next', then on the region screen, confirm your region, then click 'next' again, then confirm your keyboard layout (and add another if you would prefer to do so now); eventually you should be dumped at this screen:
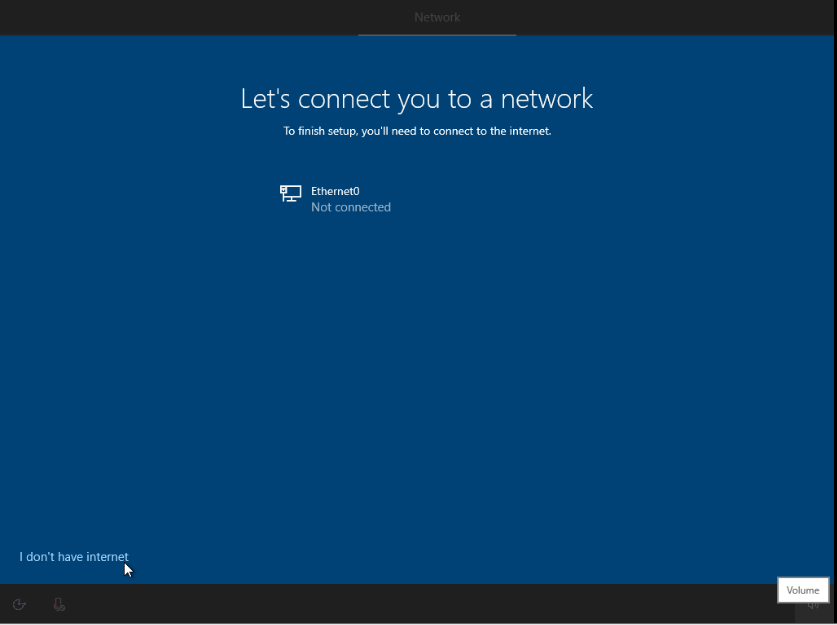
At this point, you will want to click 'I don't have internet', then 'continue with limited setup' on the next screen. After that, create a local account, and set a password with recovery questions (strongly advised; and recovery questions are mandatory). In regards to the 'choose privacy settings for your device' screen, use the following options (by toggling the switches):
Once you reach the desktop, connect your software-containing USB flashdrive, and run OOSU10 (I would strongly advise transferring OOSU10 and the config file to the root of the C:\ drive or a folder where it won't be accidentally purged [like the documents folder]), then click file -> import settings -> ooshutup10.cfg (or the configuration's filename; if importing a configuration), or generate your own configuration; when OOSU10 prompts you to restart, do restart in order to properly apply all settings (such as disabling telemetry). You should re-run OOSU10 after every major system update, as a few settings will likely be reset. After restarting, you should install your drivers if you opted to manually install drivers, otherwise, simply begin running your software installers; at this point, you can connect the system to the internet.
After installing your preferred software, letting Windows Update fetch and install drivers (if you went that route), and making whatever changes you might've made along the way, now comes time to perform the final steps of the installation: default applications and disabling fast startup.
To configure default applications, you can click the start button (or strike the Windows/"super" key on your keyboard) and type 'default' into the searchbox, and click 'default apps.' I strongly advise changing the default web browser (even though Windows will try to nag you into using Edge), audio and video players, and e-mail client (if you've chosen to install a 3rd party e-mail client).
To disable fast startup, once again use the start menu's search function to access control panel, then type 'power plans' into the search box in the upper-right-hand corner, then:
After enough time, you now have a hardened Windows 10 installation, which can run with relatively low maintenance over the next few years. However, in order to maintain your configuration, you should re-run OOSU10 after running updates, as well as periodically running Bleachbit to purge logs, file access history, thumbnails, clipboard data, and the like.
I should add that I do not recommend using Windows 11 under any circumstances, because not only does it require TPM 2.0, the home edition also requires using a Microsoft account, which connects you to a plethora of privacy violating services (as if the Microsoft account wasn't enough of a violator in-of-itself), such as Onedrive and Edge sync.
Copyright 2022, Econobox_ (d.b.a konat.neocities.org)